| 1.
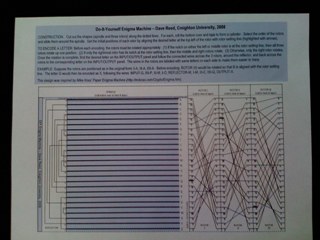
| Print a copy of the Do-It-Yourself Engima Machine template. Standard printer paper works fine, as will slightly heavier stock.
| 
|
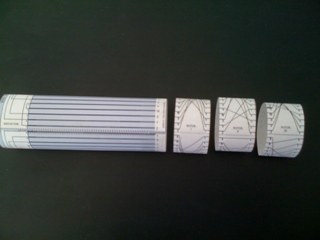
| 2.
| Cut out the four rectangular components, the spindle and three rotors, along the dashed lines. Be as careful as possible to stick to the dashed lines, as these components must fit together and align.
| 
|
| 3.
| Roll each of the four components into loops. The bottom of each piece should roll over the top and align with the dotted line labeled "roll bottom over to here & tape." Tape each loop together at the seam. Be as careful as possible to align the bottom with the dotted line, and note that the dotted lines on the rotors are slightly higher than on the spindle. This makes the rotors slightly larger in diameter than the spindle and allows them to slide around it.
| 
|
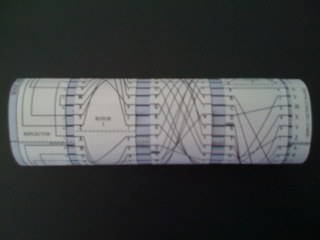
| 4.
| Select the order that you want the rotors to appear in, and slide them over the spindle. Depending on how tight the fit is, you may need to buckle the spindle in at the seam to slide the rotors on, then smooth out the spindle on the inside. The lines on the rotors should line up with the horizontal lines on the spindle. If there are considerable misalignments, you may need to adjust and retape one or more of the components.
| 
|